Login Settings
As the name suggests, the login settings of ADSelfService Plus assist you in customizing the login page and regulating access to this application.
The Login Settings page consists of three sections:
General
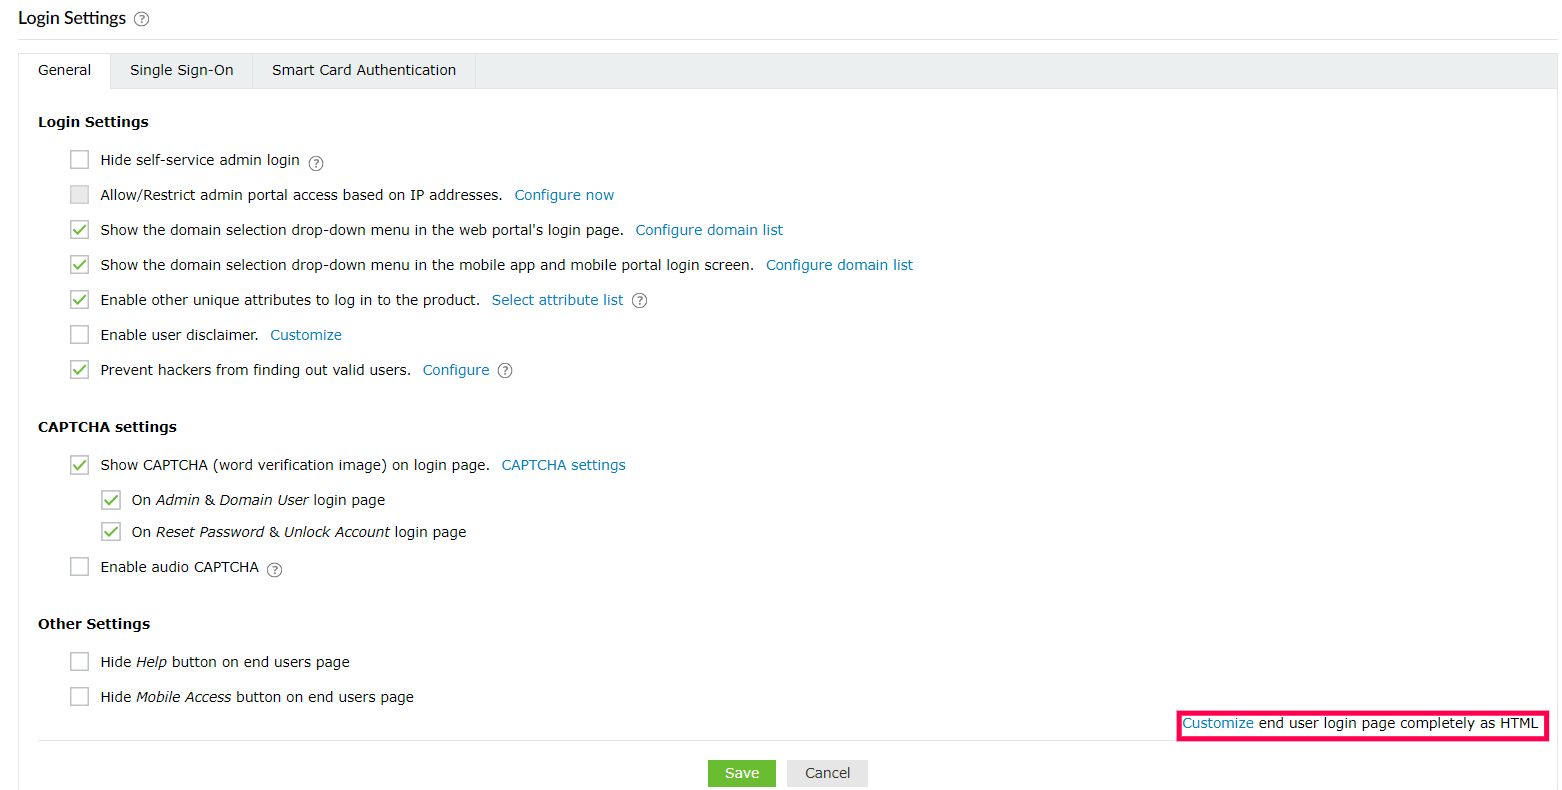
Under the General tab, you can configure user login access rights, CAPTCHA settings, and other customization options for the login page.
Login Settings
Under the Login Settings section, you can:
- Hide the self-service admin login portal for users.
- Navigate to Admin > Customize > Login Settings
- Select Hide self-service admin login.
- Click Save.
Note: By default, the ADSelfService Plus application allows you to login either as an administrator or an end user. You can enable the
Hide self-service admin login option if you wish to have a dedicated login portal for end users and hide the admin portal. It is advisable to enable this option to prevent end users from accessing the admin login portal for security. You also have the option to customize the end user portal.
Learn more.
- With the Hide self-service admin login option enabled, you can regulate access to the admin portal via IP addresses. To do this:
- Click on Admin > Customize > Login Settings
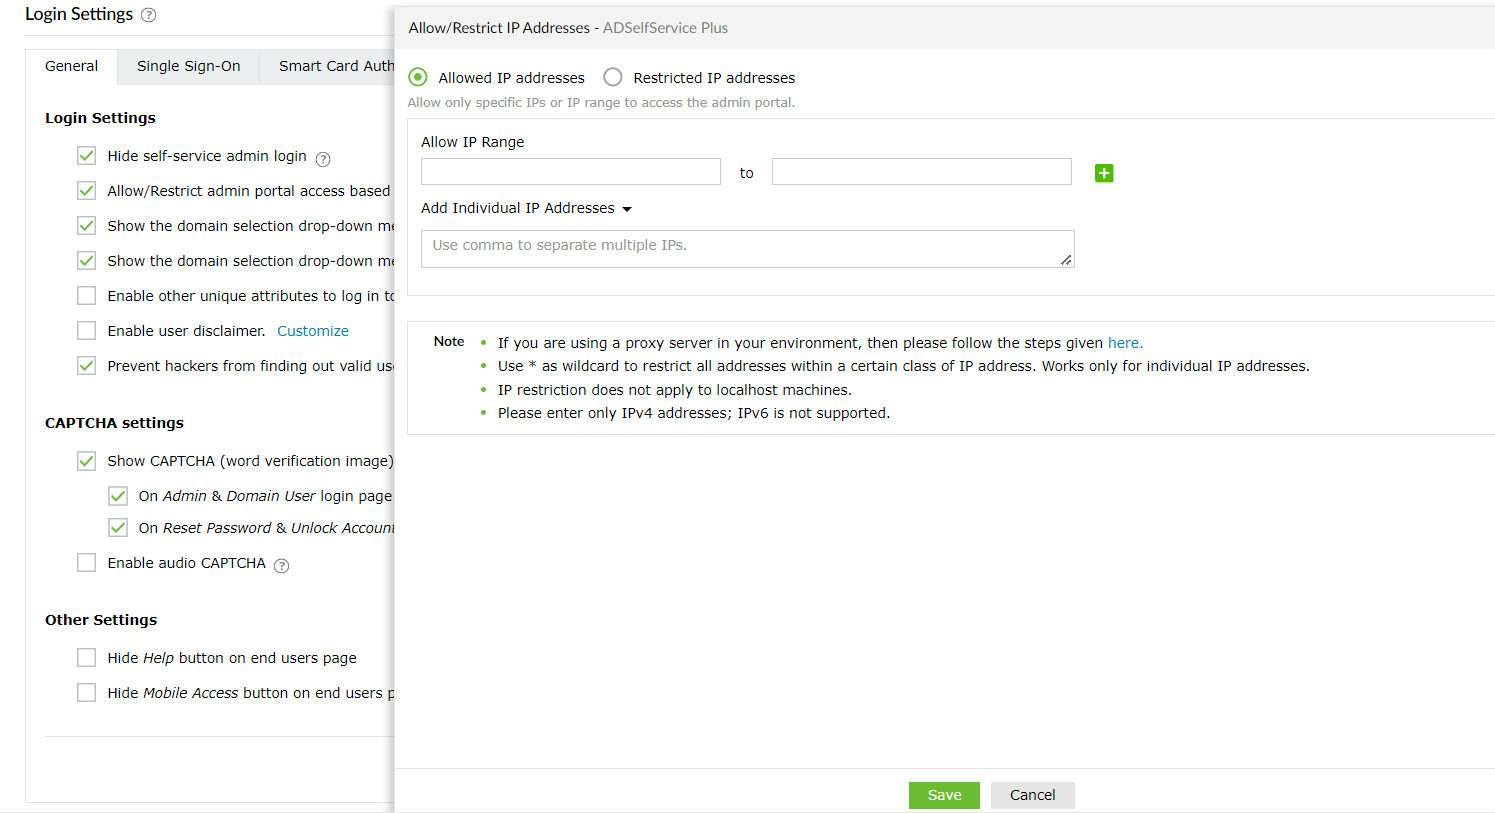
- Select Allow/Restrict admin portal access based on IP addresses.
- Click Configure now.
- Select Allowed IP addresses or Restricted IP addresses.
- Enter the appropriate IP address range in the available fields.
- Restrict or allow specific IPs by selecting Add Individual IP Addresses and entering the IP addresses. When an admin tries to access the admin portal from a restricted IP address, the access is denied and an error message is displayed.
- Click Save.
Note: If you have changed the proxy settings of ADSelfService Plus then:
- Add the following line to the server.xml file (Default location: <InstallationDirectory>/conf/server.xml).:<Valve className="org.apache.catalina.valves.RemoteIpValve" internalProxies="192\.168\.0\.10|192\.168\.0\.11" trustedProxies="172\.168\.0\.10|176\.168\.0\.11" />
- Edit the values of internalProxies and trustedProxies as per your environment.
- Enter IP address while specifying the values for internalProxies and trustedProxies, and use the vertical bar (|) character to enter multiple values.
- Restart ADSelfService Plus for the changes to take effect.
- Customize domain selection: Allow users to select their domain by displaying the drop-down list on the login page.
- Go to Admin > Customize > Login Settings
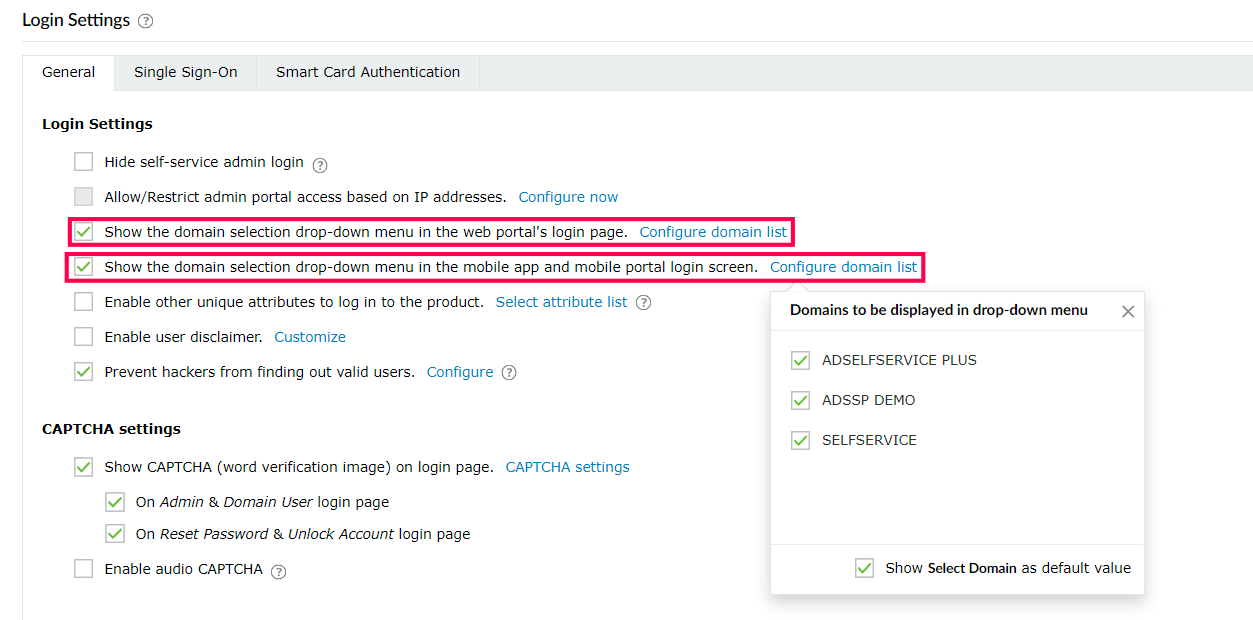
- Select Show the domain selection drop-down menu in the web portal's login page if you want to allow users to select the domain when they login via the web browser.
- Select Show the domain selection drop-down menu in the mobile app and mobile portal login screen if you want users to select the domain they log into while logging in via mobile phones.
- Click Configure domain list, and select the domains that will be displayed to users.
- Disable default domain logins by selecting Show Select Domain as default value.
- Click Save.
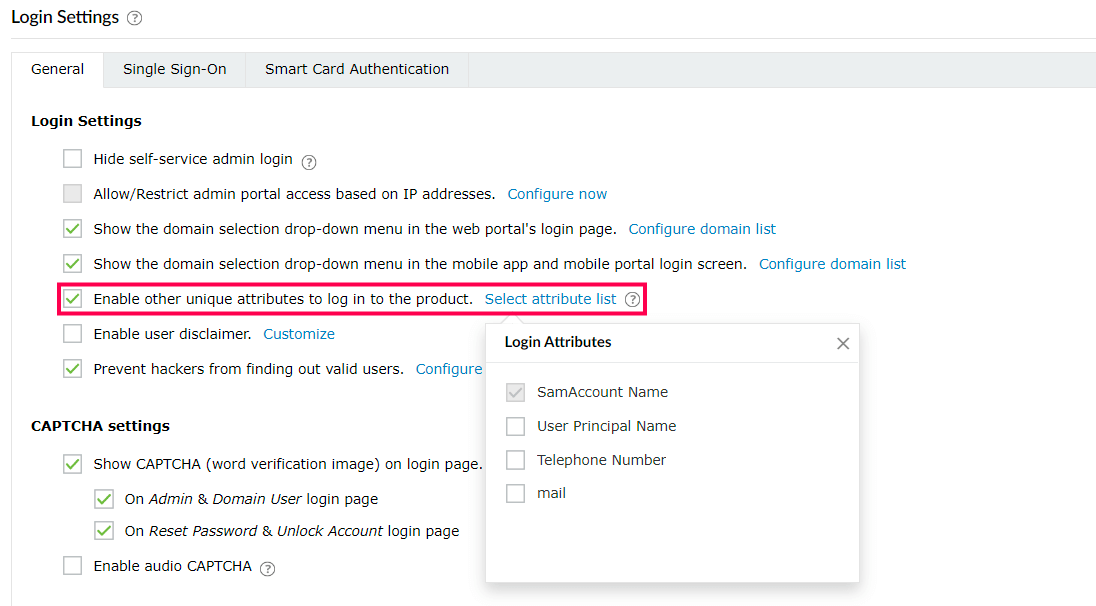
- Multi login attribute settings: Enable this option if your organization uses unique attributes for identification during login, such as employee number, email address, or mobile number.
- Navigate to Admin > Customize > Login Settings
- Select Enable other unique attributes to log in to the product.
- Click Select attribute list. From the displayed drop-down, choose an AD attribute that you want users to use to prove their identity.
- Click Save.
Note:
- Make sure that the chosen attribute value is unique across the domain (e.g. : sAMAccountName, email or telephoneNumber).
- If two users have the same value for any of the log in attributes, both users will not be able to log in.
- Attributes that have multiple data types as values, like objectGUID or distinguishedName, cannot be used as a login attribute.
- Disclaimer option: Show a custom disclaimer before users access ADSelfService Plus' portal. You can enable this option to educate users on the terms of service, and receive their consent to avoid any legal claims.
- Navigate to Admin > Customize > Login Settings
- Select Enable user disclaimer.
- Click Customize if you want to edit the default user disclaimer.
- Click Save.
Note: Reset disclaimer status for all users option is used to erase users acknowledgement to access ADSelfService Plus' portal.
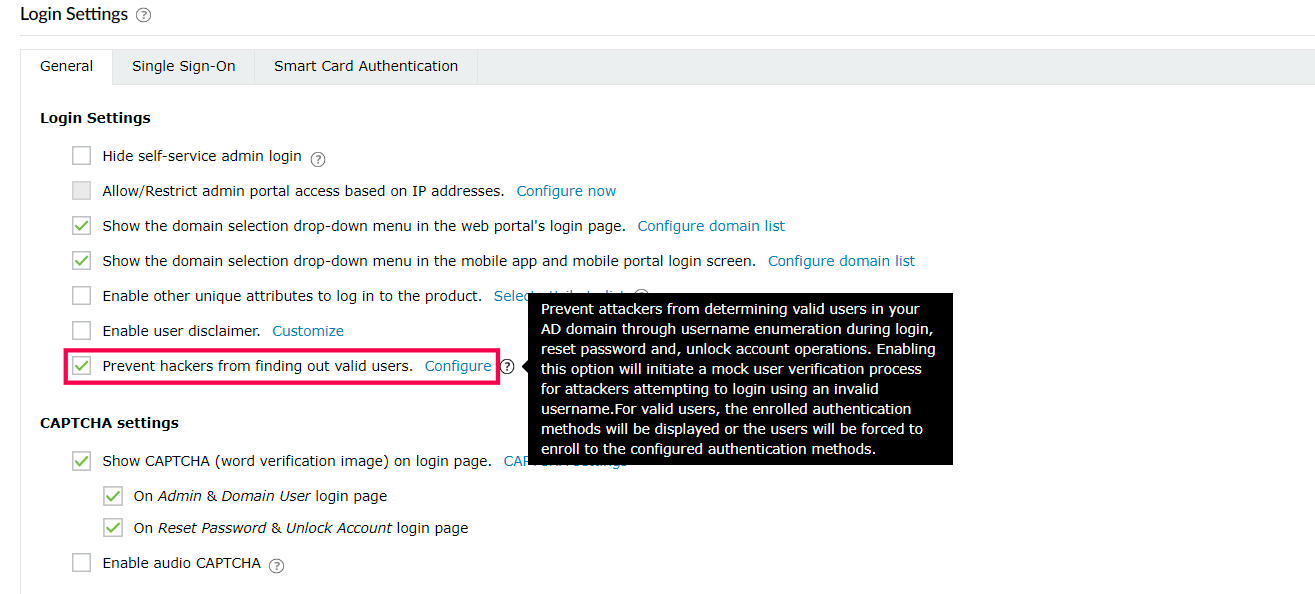
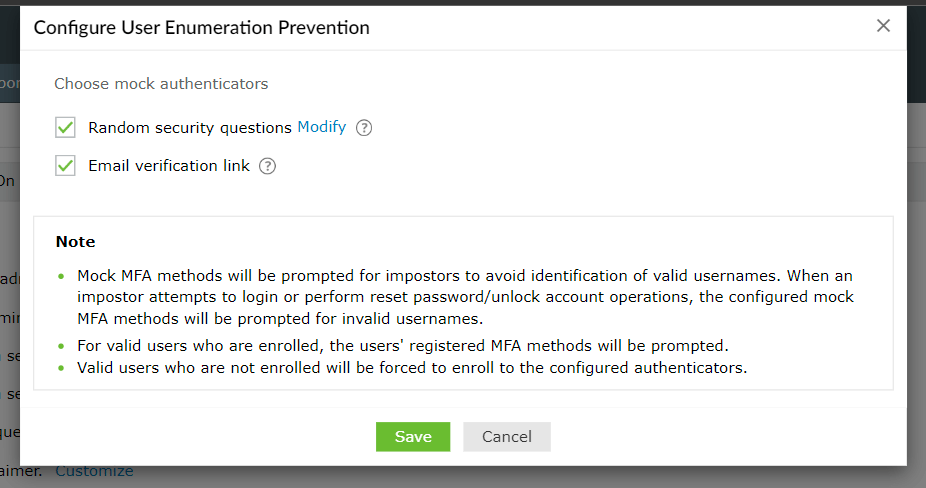
- Prevent hackers from finding out valid users: Initiate a mock verification process to prevent attackers from determining valid usernames in the domain.
- Navigate to Admin > Customize > Login Settings
- Select Prevent hackers from finding out valid users.
- Click Configure to enable the authenticators to be displayed during the mock MFA process. If you enable the Random security questions option, two random security questions will be displayed. By clicking Modify, you can customize the security questions. If you enable the Email verification link option, a message reading Email verification link sent will be displayed to the user. This is a false message and no email will be sent to the user.
- Click Save.
CAPTCHA Settings
This setting displays a CAPTCHA image on the login page as a defense mechanism against bot-based brute-force attacks. End users must enter the text shown in the CAPTCHA image (or for the audio played) in order to log in to the self-service portal.
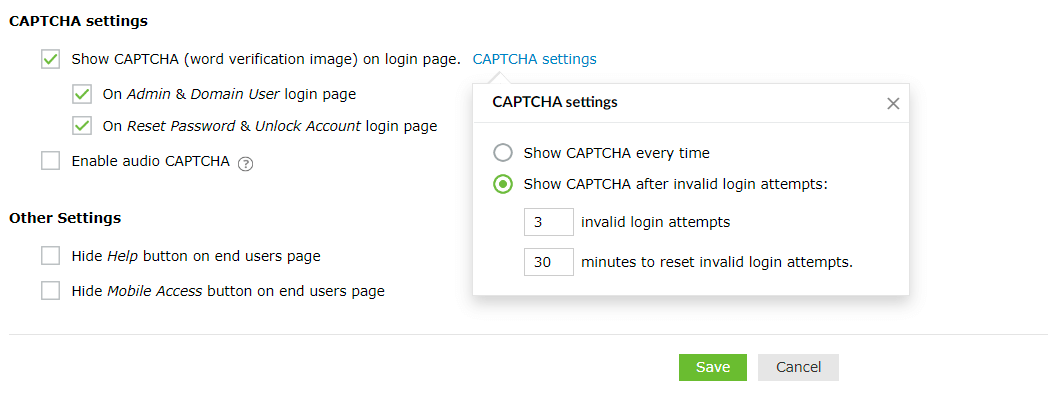
Configuring CAPTCHA for logins:
- Go to Admin > Customize > Login Settings
- Select Show CAPTCHA (word verification image) on login page.
- Enable CAPTCHA for the login pages of admin, domain user, and during password reset and account unlock.
- Click the CAPTCHA settings link to configure whether to show CAPTCHA every time, or only after a certain number of invalid login attempts.
- Select Show CAPTCHA every time to always display CAPTCHA whenever someone tries to login to the product.
- Select Show CAPTCHA after invalid login attempts to enable captcha only after a certain number of invalid login attempts. Enter the number of invalid login attempts allowed and the time (in minutes) that must pass before the invalid login count is reset.
- Select Enable audio CAPTCHA to offer CAPTCHA for visually impaired users.
- Click Save.
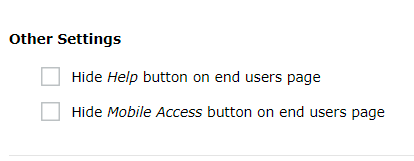
Other Settings
- Choose whether to hide the Help button or the Mobile Access button in the end user portal.
- Click Save.
Customizing end-user portal interface
ADSelfService Plus enables you to customize the end-user login page.
Enabling end user login page customization
- Go to Admin > Customize > Login Settings
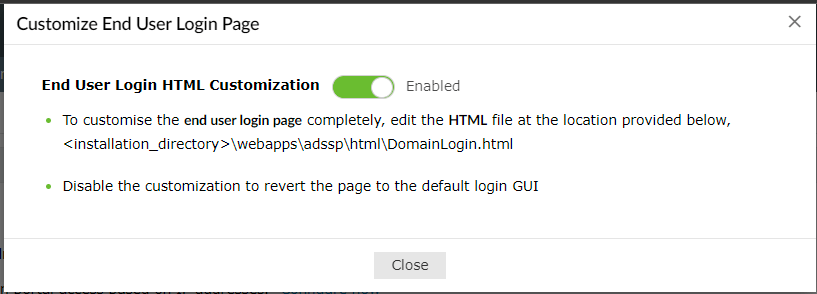
- Select Customize end user login page completely as HTML.
- Enable End User Login HTML Customization. You can now customize the end-user login page.
- Navigate to the DomainLogin.html page in the installation folder. (Location: \webapps\adssp\html\DomainLogin.html).
- Make the necessary edits and save it.
Disabling end user login page customization
- Go to Admin > Customize > Login Settings
- Select Customize end user login page completely as HTML.
- Disable the End User Login HTML Customization setting.


 ADManager Plus
 ADAudit Plus
 Exchange Reporter Plus
 M365 Manager Plus